Project diary - Blaster rifle and defibrilator for Galaxy Awaits Star Wars LARP
This is a quick blog post about two props I made for Galaxy Awaits LARP which I traveled to in February of this year. It was a lot of fun, but I had to leave early on Saturday afternoon. I’d love to attend again as the same character or possibly even a lightsaber-wielder.
Blaster rifle

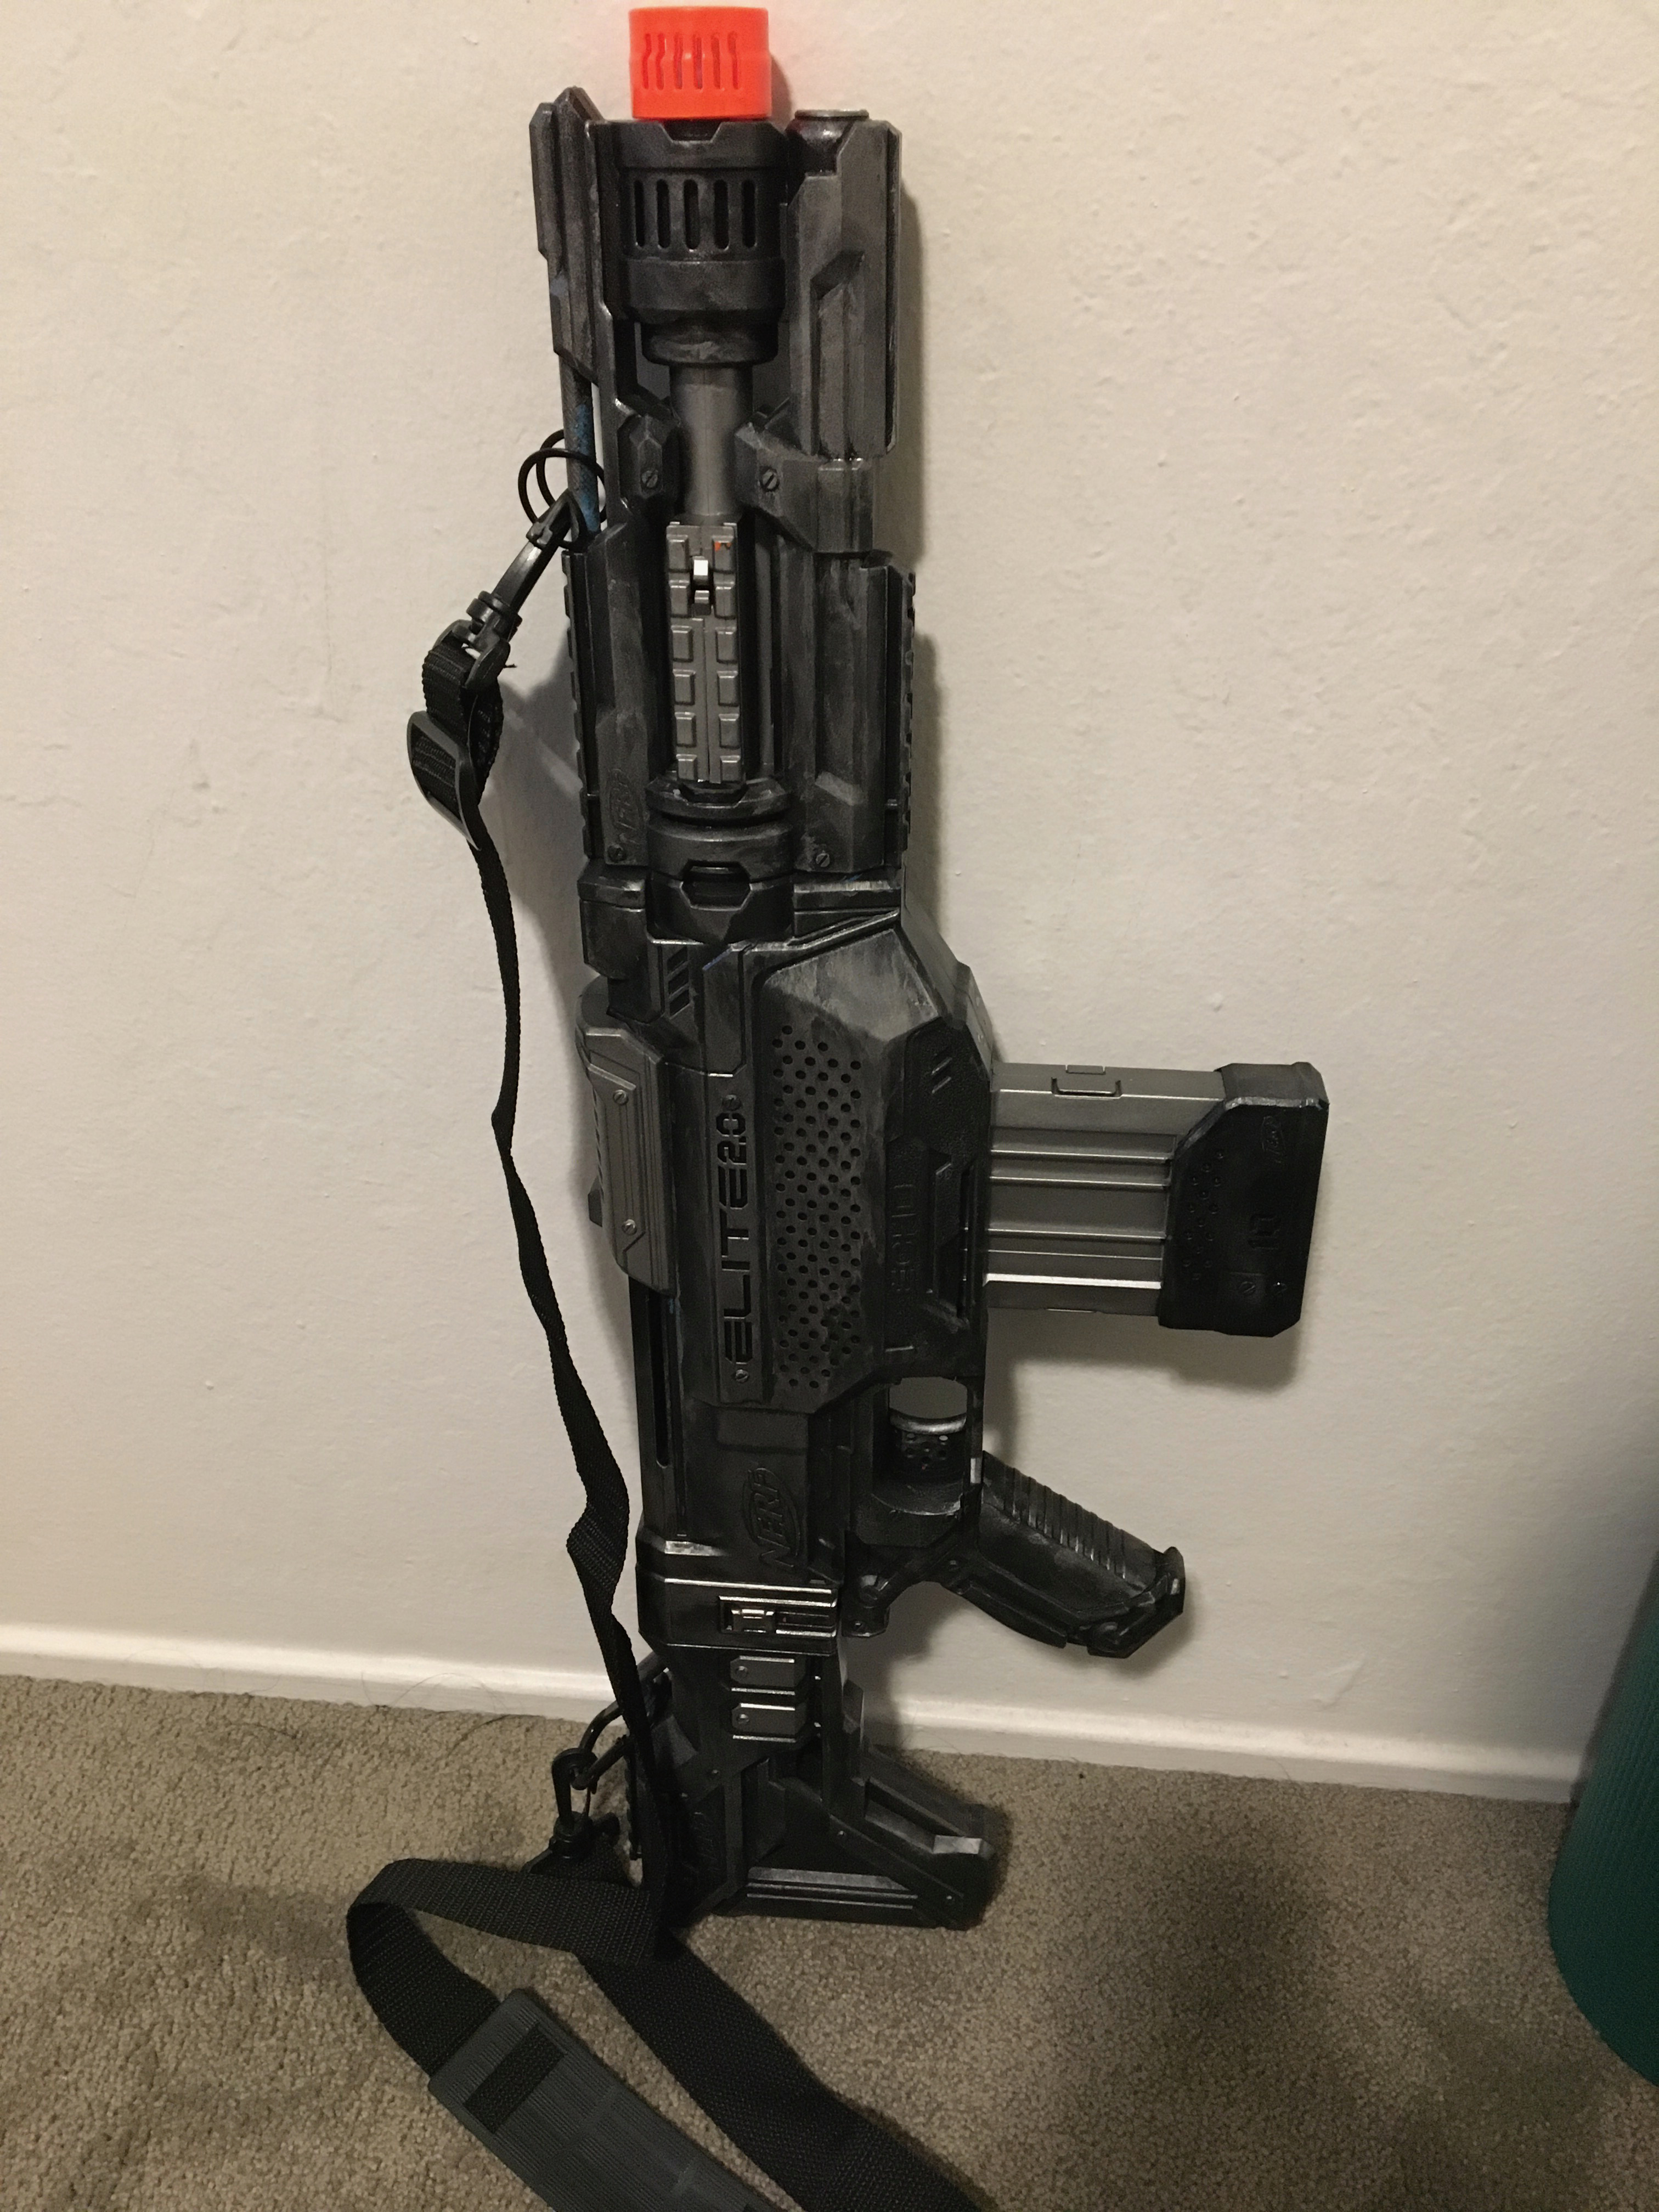
I used the Nerf Elite 2.0 Echo blaster, which had a chunky, military look that I liked. Unfortunately, it kind of sucks. The magazine action is not very smooth, and unintuitively, you have to pull the priming slider back to be able to release the magazine. But the vents on the side of the barrel, as well as the central barrel itself and magazine, looked fantastic.
I started by splitting the blaster up into its four parts and covering the orange barrel tips (the one shown, as well as the one that remains after detaching the front barrel part) with masking tape. I sprayed Vallejo Black airbrush primer in a few coats all over the blaster pieces, and it went on smooth without needing to dilute it and was reasonably resistant to overspray. Since this black primer looked pretty good, and I was going to lighten it with a metallic grey, I decided not to spray a real black paint over it. You could totally do it if you wanted the black to be darker.
I used Army Painter “Gun Metal”, a metallic medium-dark grey miniature paint. To add a weathered appearance to the parts, I put a few drops of paint on my (gloved) fingers, then smeared it on around all the raised parts of the blaster. Kind of like drybrushing, but with my fingers. The first few times, I used too much paint, so it was more like painting with my fingers instead of drybrushing, and I had to work a bit to spread the paint around and stop it from pooling. Use less paint than you think, and go over it more times! In the end, the effect was really cool and added a lot of depth to the blaster.
To paint the gunmetal parts on the magazine, the barrel, the slide, and some accents on the stock, I applied masking tape (sometimes very intricately by tearing it into tiny pieces like I had to do for the complex geometry of the barrel), then airbrushed a few layers of the Army Painter Gun Metal. I had a tough time stopping the paint and primer from rubbing off where the slide scraped against the body of the blaster and other moving parts, but I wanted to paint at least a coat of primer under the slide. I tried not to move them as much as possible, but the paint and primer did get scratched off in the end.
I used U.S. Art Supply Matte Airbrush Sealer to apply a protective topcoat. As I mentioned in the Pittsburgh topographic map post, it dries and gunks up the airbrush very easily. Forget about using a double action - even a single action is really hard to get unclogged, and you only get a minute or two of spraying time before the flow starts to reduce. It does seem like this matte sealer is pretty resistant to overspray. I definitely oversprayed some parts and it looked gluey while drying but was unnoticable after it dried.
I attached a shoulder strap from a camera bag or a sling bag I bought at the thrift store to the attachment points on the NERF blaster using a carabiner and a keyring. The front attachment point was a little too small to get a carabiner around, so I had to get creative with a keyring. Sadly, after a weekend of walking around, the sharp keyring had rubbed off the paint in that attachment point, and a few other high-friction points had lost their paint.
Still, it was a fun project that taught me how to use the airbrush, and the blaster rifle is still a really cool looking prop!
Defibrilator

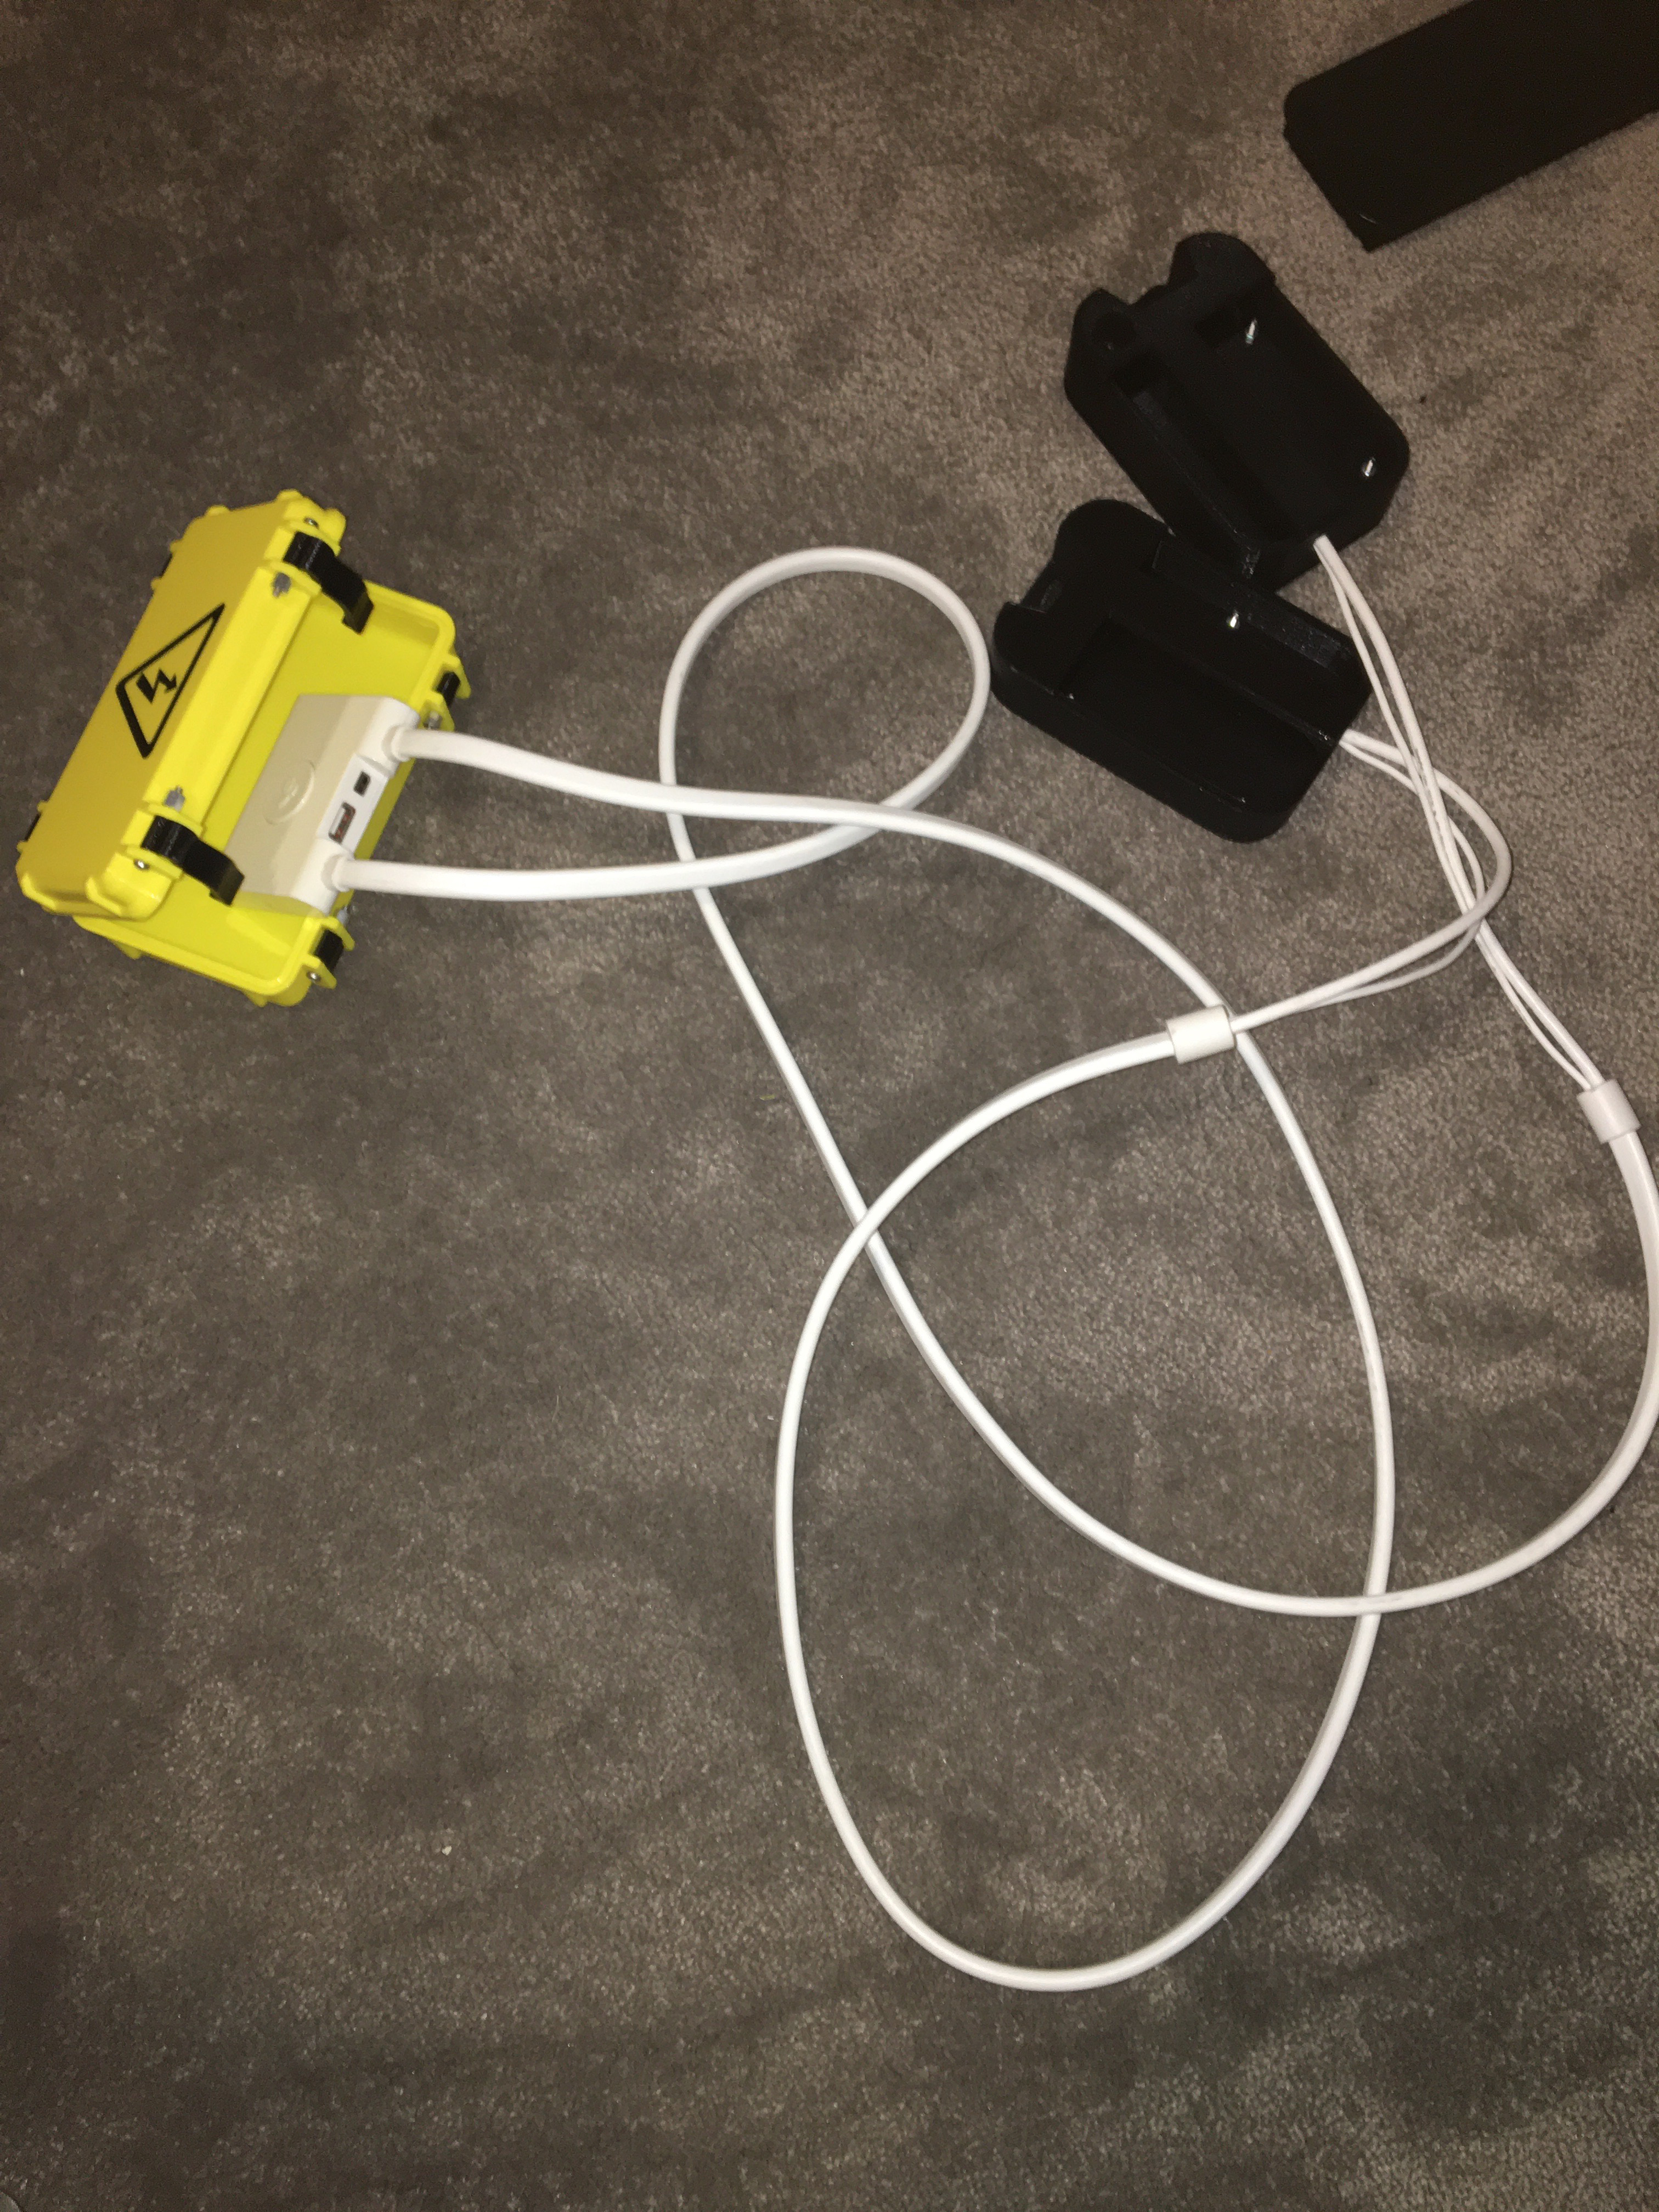
I made a defibrilator from Nibb31’s frog box 3D printed in yellow filament with black clasps and a random peripheral I found in the junk pile at work for the white wires. The paddles are Riv3’s paddles. I trimmed off the USB ends of the peripheral, stuck them into the paddles, and hot glued them in. I think superglue or something else would be more solid. The paddles are also a little small - I’d print them at 120% or even 150% for a nice comfy hold.
The paddles don’t fit inside the box, but that can be easily remedied with a larger box. I didn’t think of a good idea of how to get the wires to come out of the box so the box could be closed, or how to attach the white peripheral to the inside of the box. Probably the best thing to do is to drill holes in the side of the box and pass the wires through, then screw the white peripheral into the bottom of the box or something.
Other props I made
I also 3D printed 20 or so of WaveSkyLord’s stocking test tubes to be prop vials for medicines and such, in white PLA with PVA water dissolvable supports for the lids.
For the rank badges, I printed SkyRider007’s Imperial cadet rank badge since that was what aligned with the “Ensign” rank for Galaxy Awaits Larp, and used Matterhackers Silky white filament (shiny-ish, to mimic metal) for the bottom and used the second extruder to print Matterhackers Ruby Red (a deep, slightly translucent red) for the top. Hot-gluing safety pins was way too fragile, so I ended up using a command strip to affix a magnetic name tag holder to the back of it. The magnetic name tag holder might feel strong, but it loses its strength really quickly through more than 1 layer of fabric, or 1 layer of thicker fabric. I almost couldn’t find a place to attach it to my tactical vest.